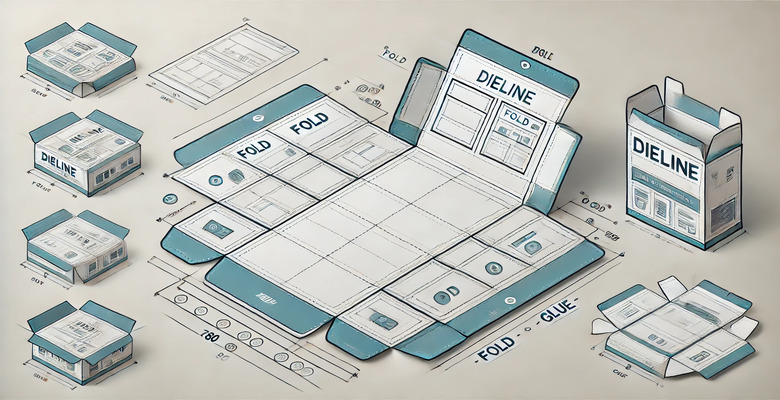
If you’ve ever admired a beautifully designed box, you’ve probably wondered: how do they get everything in the right place? The answer lies in the dieline.
A dieline is the blueprint of your packaging. It ensures every fold, cut, and design element is exactly where it needs to be. But why is it critical for packaging design? Without a well-prepared dieline, your packaging could turn into a manufacturing nightmare. From branding alignment to ensuring structural integrity, dielines prevent costly errors and ensure your product stands out.
Ready to learn how to create a perfect dieline? Let’s dive in.
Steps to Create a Perfect Dieline
Creating a perfect dieline is a meticulous process, but don’t worry—we’ve got you covered. Let’s break it down step by step.
1. Use the Right Tools and Software
First things first, you need the right tools for the job. Choosing the appropriate software is crucial for creating an accurate and professional dieline.
So, which software should you use?
Adobe Illustrator: This is a go-to choice for many designers. It’s user-friendly and excellent for creating vector art, which is essential for dielines. If you’re new to dieline creation, Illustrator’s intuitive interface can make the process smoother.
ArtiosCAD: If you’re dealing with complex packaging designs that require precise measurements and intricate details, ArtiosCAD is your best bet. It’s specifically designed for packaging professionals and offers advanced features for structural design.
But wait, there’s more!
Other tools like Esko Studio, CorelDRAW, or even Inkscape (a free alternative) can also be used, depending on your needs and budget.
Pro Tip: Always stick with vector-based tools. Why? Because vector graphics use mathematical equations to represent images, ensuring they can be scaled infinitely without losing quality. This is vital for maintaining the integrity of your dieline at any size.
Read More: Mastering Packaging Design Software: 12 Best Tools
2. Measure and Set Dimensions (Get It Right!)
Now that you’ve got your software ready, it’s time to roll up your sleeves and dive into measurements.
Imagine this scenario: You’ve designed an eye-catching box, but when it’s produced, your product doesn’t fit! To avoid this nightmare, precise measurements are key.
Here’s how to get started:
- Begin with an existing package: Find a box similar to what you need—like a cereal box—and carefully disassemble it. Flatten it out to study its dimensions, folds, and creases. This hands-on approach gives you a tangible understanding of how packaging works.
- Measure twice, cut once: Use a ruler or caliper to measure the length, width, and depth of your product. Don’t forget to account for any protective packaging like foam or bubble wrap.
- Set up your document: In your chosen software, create a new document with the exact dimensions you’ve measured. Set the units to millimeters or inches, depending on your preference.
Read Also: Shoe Box Dimensions: Everything You Need to Know
Why does vector art matter here?
Scalability
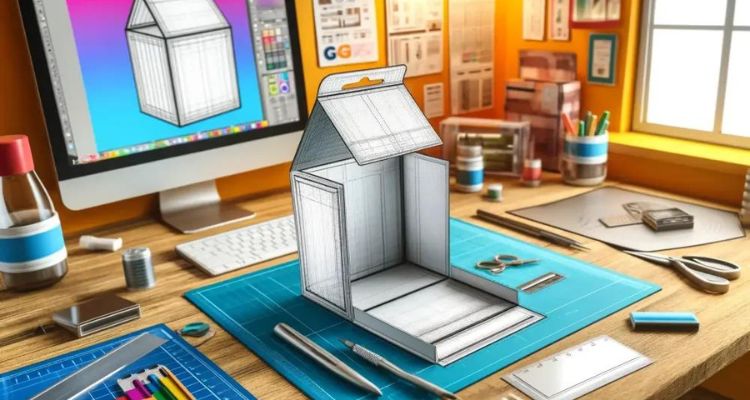
Vector images maintain crisp lines and shapes at any size, ensuring your dieline is accurate whether it’s viewed on a screen or printed.
Precision
Vector tools allow for exact placement of lines and shapes, which is crucial for aligning folds, cuts, and design elements.
Remember “Always double-check your measurements—small errors can cause big problems later!”
3. Add Key Design Elements (Color and Branding)
Now comes the fun part—adding your branding and design elements to make your packaging truly stand out.
But hold on a second, there’s more to it than just slapping on a logo.
Follow these steps:
- Set the correct color mode: Ensure your document is in CMYK color mode. This is important because printers use CMYK inks, and designing in this mode ensures colors print accurately.
- Use spot colors for special areas: For folds, cuts, and glue areas, use Pantone spot colors. Assign specific colors to these elements (e.g., magenta for cuts, cyan for folds) and name the swatches accordingly.
Structuring your design effectively:
Logos:
- Place logos in areas where they will be most visible.
- Avoid placing logos over folds, cuts, or glue areas to prevent distortion or being cut off.
Text:
- Keep important text away from edges and folds.
- Use legible fonts and appropriate font sizes.
Images and Graphics:
- Use high-resolution images (300 DPI or higher).
- Ensure images are in vector format when possible.
Here’s a quick reference table:
| Element | Best Practices |
| Logos | Keep clear of cut lines, folds, and glue tabs |
| Text | Avoid placing near folds; maintain a safe margin |
| Images | Use high-resolution and vector formats; watch out for bleeds |
Don’t forget about the ‘Safe Zone’:
Keep all crucial design elements within the safe zone (typically 1/8 inch inside the cut lines) to ensure nothing important gets trimmed off.
4. Add Bleed and Markers
Wait—what’s bleed, and why is it important?
Bleed refers to the area of your design that extends beyond the actual dimensions of your dieline. This ensures that when the packaging is cut, there are no unprinted edges.
Here’s what you need to do:
- Add bleed:
- Extend your background images and colors at least 1/8 inch (3mm) beyond the cut lines.
- This accounts for any minor shifts during the cutting process.
- Include markers:
- Cut lines: Indicate where the packaging will be cut.
- Fold lines: Show where folds will occur; usually represented with dashed lines.
- Glue tabs: Clearly mark glue areas and keep them free of design elements.
- Perforations: If applicable, indicate with dotted lines.
Why you can’t skip this step:
Neglecting to add bleed can result in unsightly white edges on your packaging—a surefire way to make your product look unprofessional.
Heads up: “Neglecting bleed can lead to ugly white edges—don’t skip this step!”
Testing and Proofing Dielines
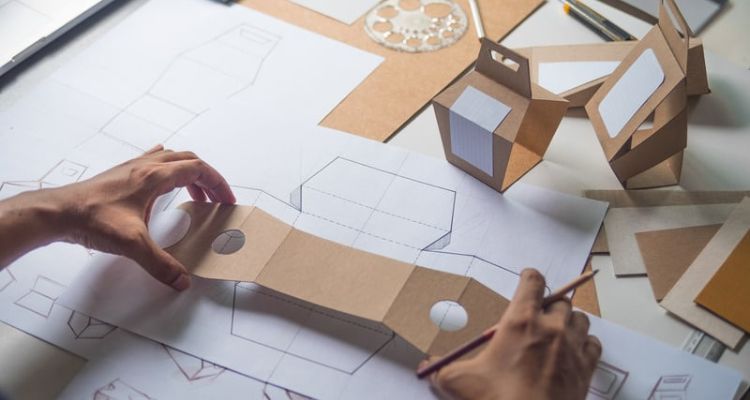
Creating your dieline is a significant achievement, but you’re not done yet. Testing and proofing are essential to ensure your packaging turns out exactly as intended.
1. Using Mockups (Visualize Before Production)
Ever bought furniture from IKEA? You wouldn’t start building without looking at the instructions, right? The same goes for packaging—mockups are your instructions and preview rolled into one.
Here’s how to proceed:
Create a 2D mockup:
- Print your dieline on paper.
- Cut it out and assemble it to see how it fits together.
- Check for alignment of design elements across folds and panels.
Generate a 3D mockup:
- Use software features or plugins to create a digital 3D rendering.
- This helps visualize the final product without physical prototypes.
Why this step matters:
Catch errors early: Spot misalignments, design flaws, or sizing issues before they become costly mistakes.
Share with stakeholders: Provide a visual aid for team members or clients to approve.
Remember: “By visualizing the design in 3D, you can catch errors like misaligned logos or text placement that could ruin the final product.”
2. Team Collaboration (More Eyes, Fewer Errors)
Even the most meticulous designer can miss something. That’s why collaboration is your secret weapon.
Here’s what to do:
Organize a review session:
- Include team members from design, production, marketing, and even sales.
- Each department can provide unique insights.
Use checklists:
- Have a standardized checklist for dieline review, covering all essential aspects like measurements, bleeds, color modes, and branding guidelines.
Encourage feedback:
- Create an environment where team members feel comfortable pointing out potential issues.
The benefits are huge:
Avoid costly reprints: Catching errors before production saves time and money.
Improve overall quality: Diverse perspectives can enhance the final design.
Insight: “The earlier you catch errors, the less expensive they are to fix!”
Practical Applications of Dielines
Dielines are the backbone of any successful packaging design, but their utility extends far beyond simple boxes. In fact, dielines are used in a wide array of packaging types to ensure precise, flawless production. Let’s explore how dielines are applied across different packaging forms.
Types of Packaging (From Boxes to Brochures)
- Boxes
From cereal boxes to custom product packaging, dielines are critical to perfectly align each fold, cut, and glue tab. Dielines provide a clear map of where each element—whether it’s branding, text, or structural components—should go. This is especially important for more complex packaging like mailer boxes or shipping boxes, where multiple folds and cuts must align to maintain both form and function.
- Brochures
Dielines ensure that all folds and panels align without cutting off crucial information. In tri-fold or bi-fold brochures, for example, dielines help designers lay out graphics and text so that nothing critical is lost in the folds. Without a properly designed dieline, a fold could inadvertently cover up key marketing messages or disrupt the flow of information.
- Food Packages
Food packaging, from snack bags to large cartons, relies heavily on dielines. These help ensure that logos, nutritional labels, and brand messaging appear exactly where they should, with no misalignments. Dielines also indicate where seals, tear lines, or perforations should go to enhance functionality while maintaining visual appeal.
Read Also: Revolutionizing Sugar Storage: The Rising Popularity of Paper Tube Packaging
- Retail Displays
Large, complex point-of-sale displays (POS) also depend on dielines for accurate assembly. These displays often involve multiple layers, cuts, and folds that need to hold up under the weight of products, making precision crucial. A minor misalignment in the dieline could compromise the entire display’s structural integrity.
- Labels
For products that require labels, such as bottles or cans, dielines ensure the label wraps perfectly around the product without leaving any gaps or overlapping text. Dielines for labels also need to account for product shape and curvature to avoid distortion of branding or imagery.
Try this: Grab a box from your kitchen pantry, flatten it, and observe where each fold and cut is placed. You’ll notice that everything—from tabs to glue lines—is perfectly aligned thanks to the dieline. This same principle applies across all forms of packaging.
Common Dieline Mistakes (And How to Avoid Them)
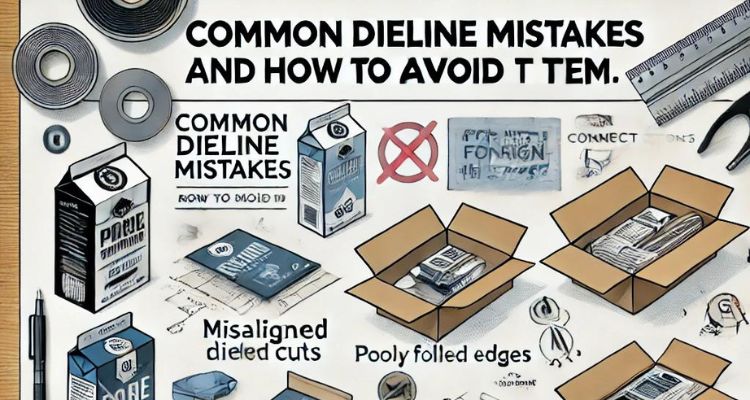
Even seasoned designers can make mistakes when creating dielines. Let’s break down two of the most common errors and how to avoid them.
1. Software Errors (Avoid Photoshop!)
Using the wrong software is one of a designer’s biggest mistakes. Tools like Photoshop, while powerful for image editing, aren’t designed for creating dielines. Here’s why:
Blurry lines: Photoshop produces raster graphics, which are made of pixels. This can lead to blurred edges, especially when resizing the dieline for different packaging sizes.
Inconsistent scaling: Because raster images are resolution-dependent, you risk losing quality if you need to scale your dieline up or down.
Instead, stick to vector-based tools like Adobe Illustrator or ArtiosCAD. These tools use mathematical equations to create vector graphics, which maintain their sharpness at any size. Vector art also allows for precise measurements and scalability, critical in packaging design.
Pro tip: Always create dielines using vector graphics to ensure quality remains intact, regardless of the packaging size.
Read Also: Understanding FedEx Box Sizes: A Comprehensive Guide
2. Forgetting Bleed and Fold Markers
Neglecting to add bleed or fold markers is another common mistake that can ruin your packaging design. Here’s how to avoid it:
Bleed: Adding bleed is crucial to prevent unprinted white edges after cutting. This extra margin allows the design to extend beyond the dieline, ensuring a perfect edge.
How much bleed is enough? A general rule of thumb is to add at least 1/8 inch of bleed around your dieline. This ensures the design remains intact even if the cutter shifts slightly during production.
Fold Markers: Folds and creases need to be clearly marked to guide the printer. If you forget these markers, the printer won’t know where to fold, leading to misaligned packaging elements.
Pro Tip: Use distinct line types (such as dotted or dashed) to differentiate between cuts, folds, and glue tabs.
Conclusion
Creating a perfect dieline isn’t just about making your packaging look good—it’s about avoiding costly mistakes that could derail your entire production. With the right tools, precise measurements, and a thorough review process, your dieline can ensure seamless packaging every time.
Ready to create your dieline? Start with a mockup, collaborate with 99 designs packaging, and avoid common pitfalls to ensure a flawless final product.
FAQs:
Q1: What software is best for creating dielines?
Adobe Illustrator and ArtiosCAD are the most commonly used tools due to their precision and ease of use.
Q2: Why is bleed important in a dieline?
Bleed ensures that your design extends beyond the cut lines, preventing unprinted edges after cutting.
